How do I customize my Katmai space?
Each architecture has Branding Points, making customizing your Katmai space easy and fun - just follow these steps.
Step-by-step instructions:
Only users with the “Administrator Role” can customize their spaces. Learn how to change roles and permissions here.
- Click on the Katmai icon in the upper left to expand your menu options.
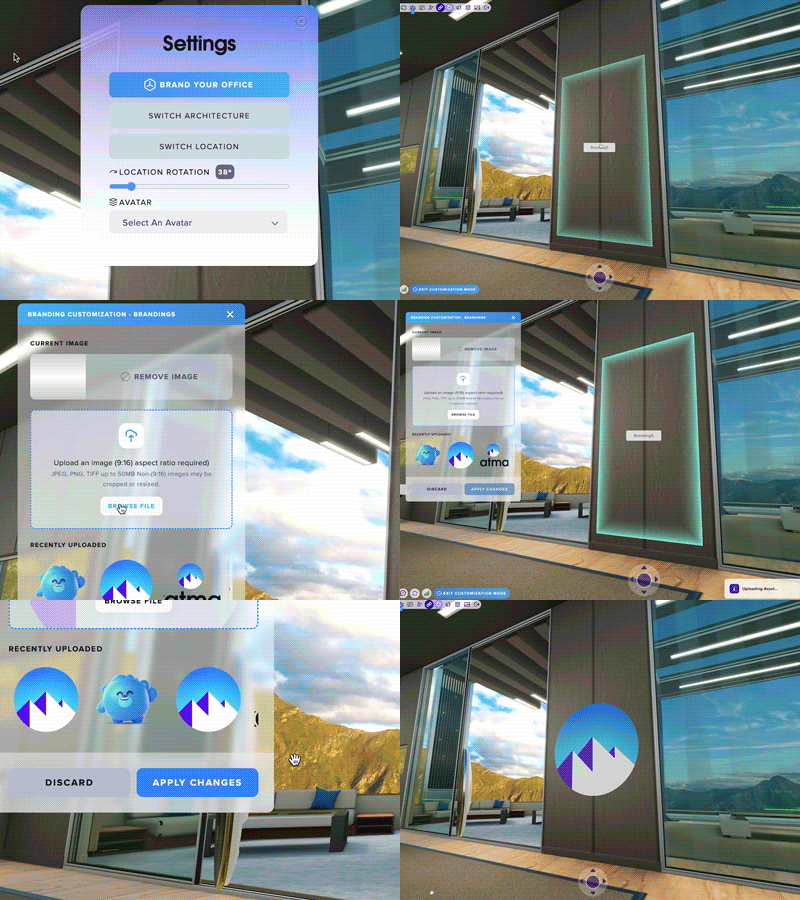
- Choose the “Space settings” icon. The first button you will see, and click on, is “Brand Your Space.” This will illuminate all of the various branding points in your space.
- Click on the branding point to open up the customization menu on the left.
- Upload an image and it will automatically be applied to the branding point.
- Hit “Apply Changes,” close out of “Brand Your Space,” and your new branding flourishes will be live.

Please note the aspect ratio information in the Browse window. Use an image editor such as Canva or Photoshop to crop and export your brand images with a file size limit of 5MB.
The menu also gives you the option to remove an image and, once you’ve uploaded more than one image, you will see a carousel of recent images at the bottom of the menu.
You can also add colors and designs to the “pillars” in your office. Follow the same instructions as you would for an image, just make sure you use your favorite image editor to create a file that is sized properly for the pillar (16x2048 pixels).
Fun fact: Your branding points will be visible regardless of which side of the wall you are on.